Generate and refine business pages with SmartPage
TIP
This guide walks you through generating a business page with SmartPage and completing the preview, editing, and self-checks before publishing. By the end, you can write clear page requirements, generate a first draft, enter "Edit page" to adjust the page, and decide whether it's ready to save or publish.
Before you start
| What to prepare | How to prepare it |
|---|---|
| Account permissions | Confirm you can open the target app and have permission to create, edit, or publish pages. |
| Target app | Confirm which app the page belongs to. Don't generate pages in the wrong app. |
| Data source | Confirm the dataset, SQL, BFF, or Backend Function the page will use is ready. |
| A real record | Prepare one real record you can inspect, to confirm the list, detail, and form fields are correct. |
| Page requirements | Write down who the page is for, which fields it shows, which buttons it needs, and what the result looks like after saving. |
Steps
- Open the Lovrabet site and go to the target app you're configuring pages for.
- Open page management or the page configuration entry, and choose to create the page with SmartPage.
- In the requirement box, spell out the page goal, audience, list fields, filter conditions, and action buttons.
- If the system asks for a data source, pick the dataset, SQL, BFF, or Backend Function that matches the page goal.
- Click Generate and wait for SmartPage to produce the first draft.
- Open the page preview and check the title, list fields, buttons, filter items, and data display first.
- If the page needs adjusting, click "Edit page" to open the editor.
- After editing, click "Preview" to check the result. Once it looks right, follow your team's process to save, submit for review, or publish.
TIP
Be as specific as possible in the requirement. Don't just write "make a management page". State who uses it, which fields, which filters, and what each button does — the more specific the requirement, the closer the result.
为运营人员生成一个供应商管理页面。
页面展示供应商列表,支持按供应商渠道、联系人和跟进人筛选。
列表字段包括供应商渠道、联系人、电话、邮箱和跟进人。
每行提供查看详情和更新操作。
页面支持新增供应商,新增时需要填写供应商渠道、联系人、电话、邮箱和跟进人。
Generate the page
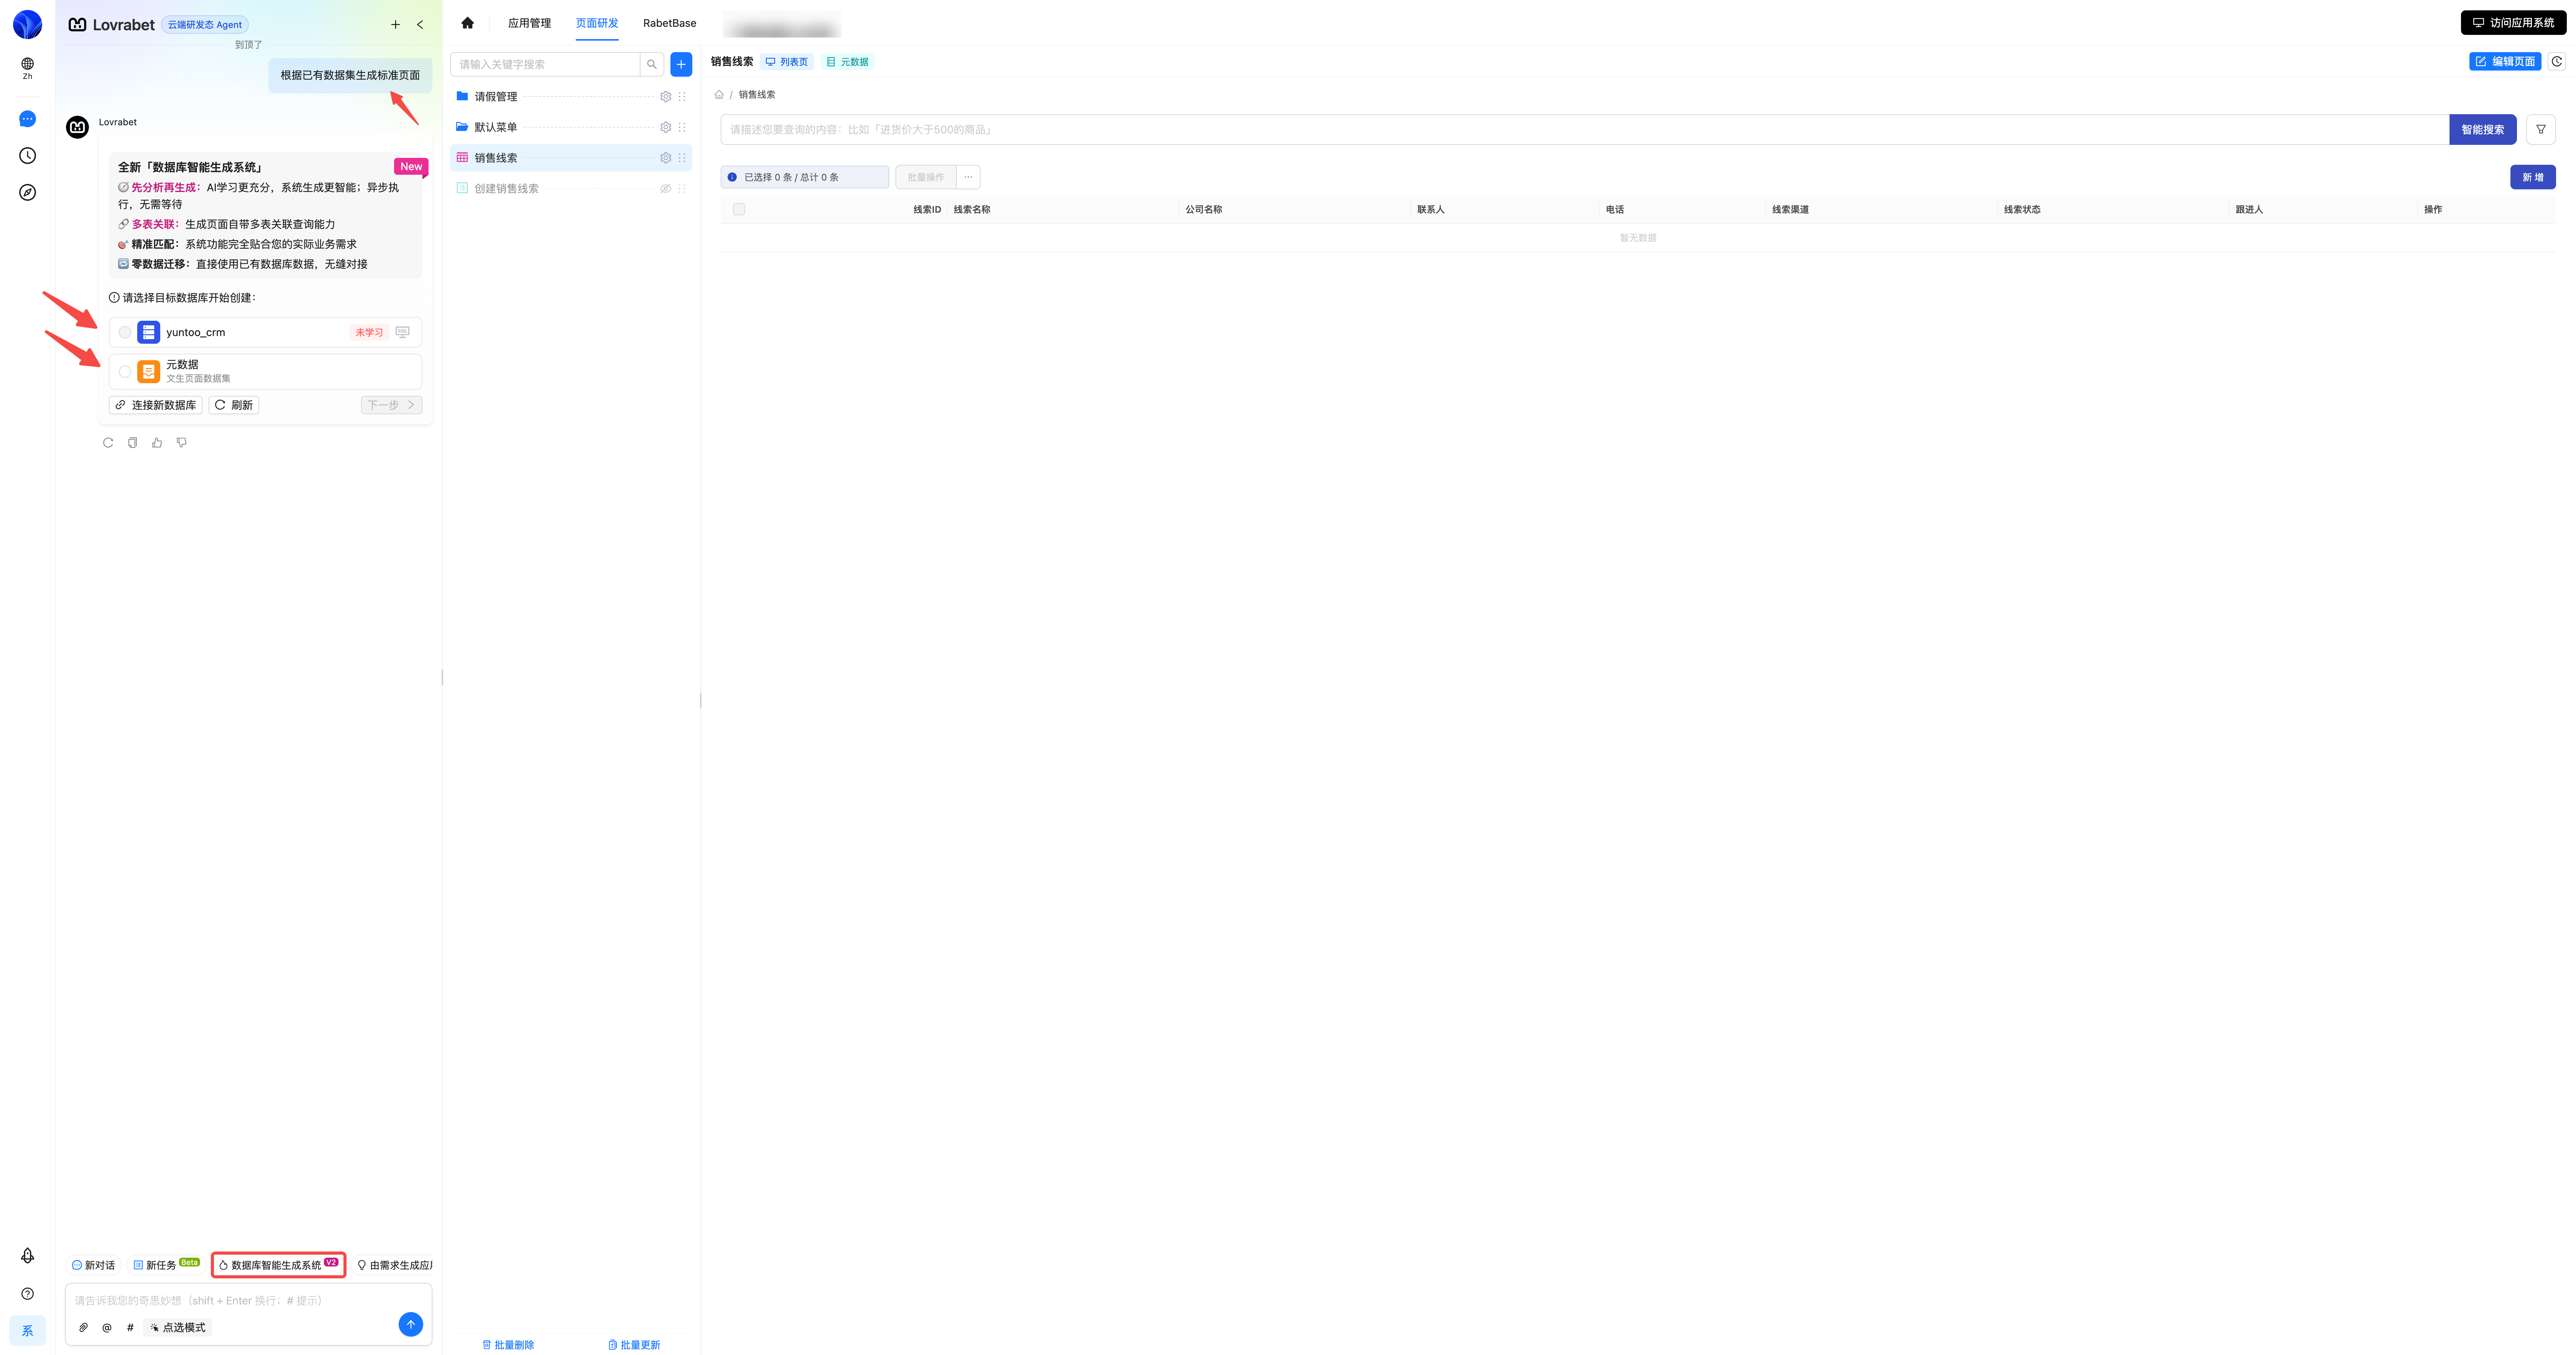
Work on the page
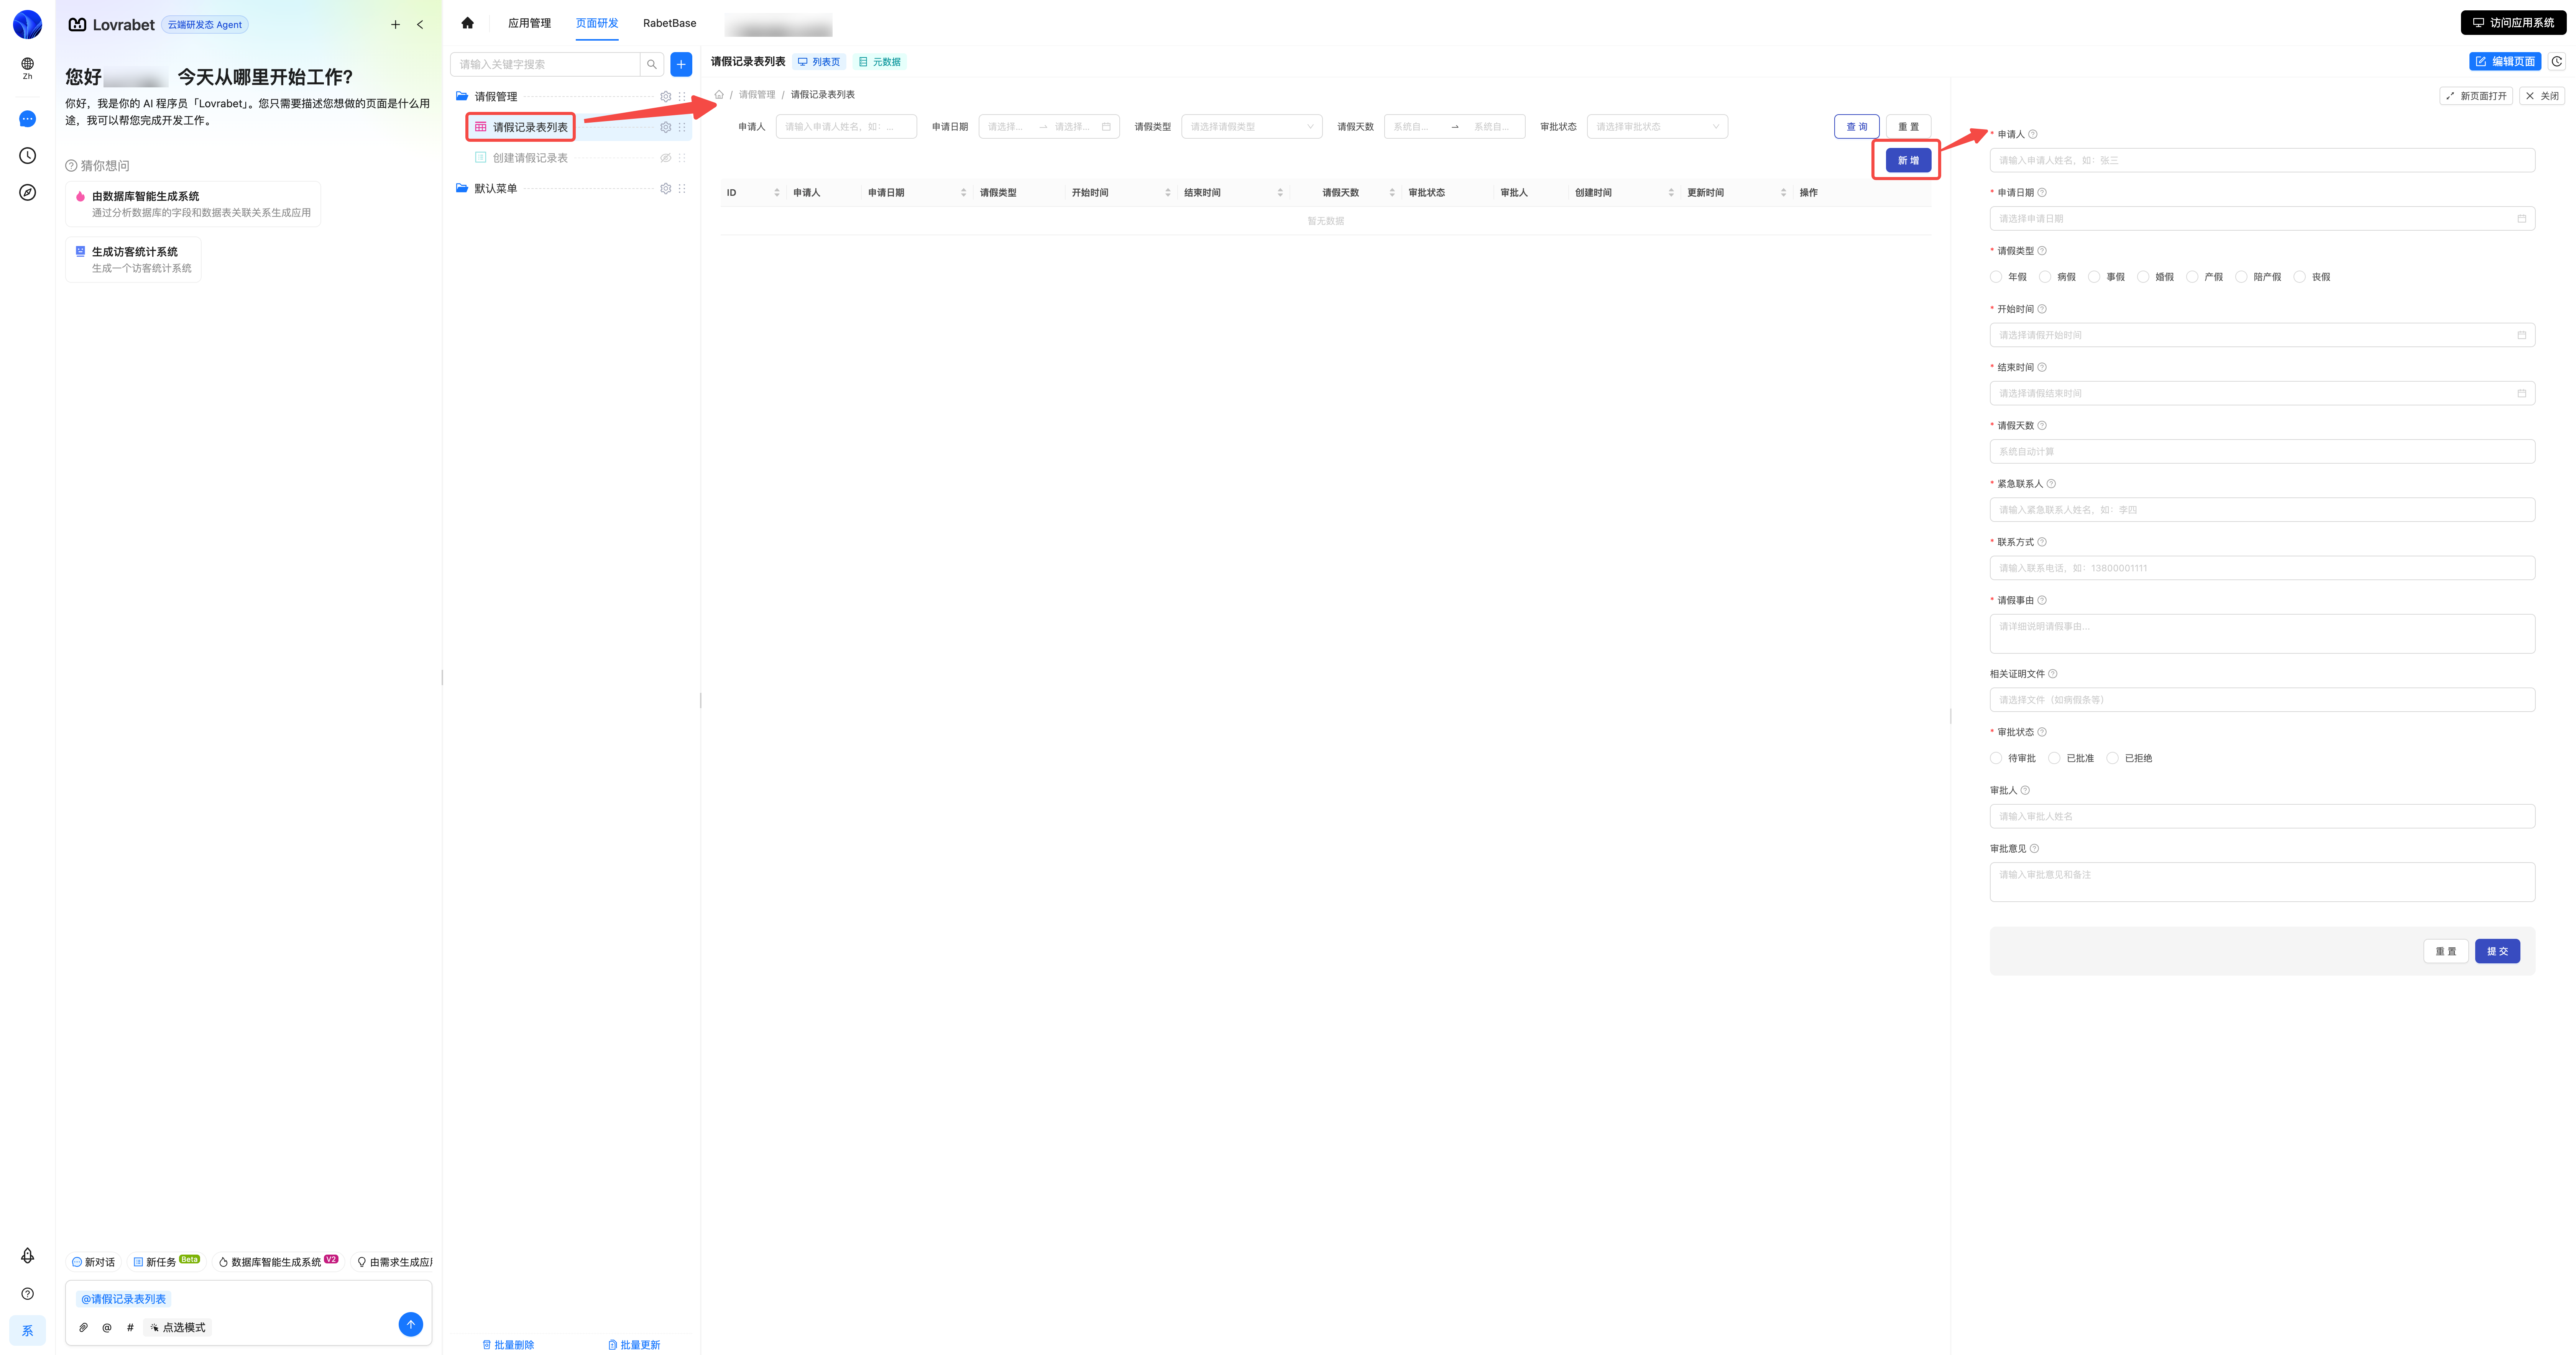
Edit the page
INFO
When the draft doesn't match expectations, go to "Edit page" and adjust it first. Don't click "Save" or "Save and preview" until you've confirmed what changed.
| What to do | How |
|---|---|
| Open the editor | Click "Edit page" in the page preview. Once the editor opens, you should see a canvas preview of the current page. |
| Check the page content | Review the page title, field names, button names, filter items, and empty-state copy. |
| Adjust the page | Tweak page copy, layout, field visibility, and button configuration in the editor. |
| Preview the result | Click "Preview" and confirm the page display and action entry points match the requirements. |
| Save your changes | Only click "Save" or "Save and preview" once you're sure the changes are correct. |
WARNING
If opening the page URL directly gives you a blank page or a "no page selected" message, go back to the app's page list, reselect the target page, and then enter the preview or editor.
Enter page editing
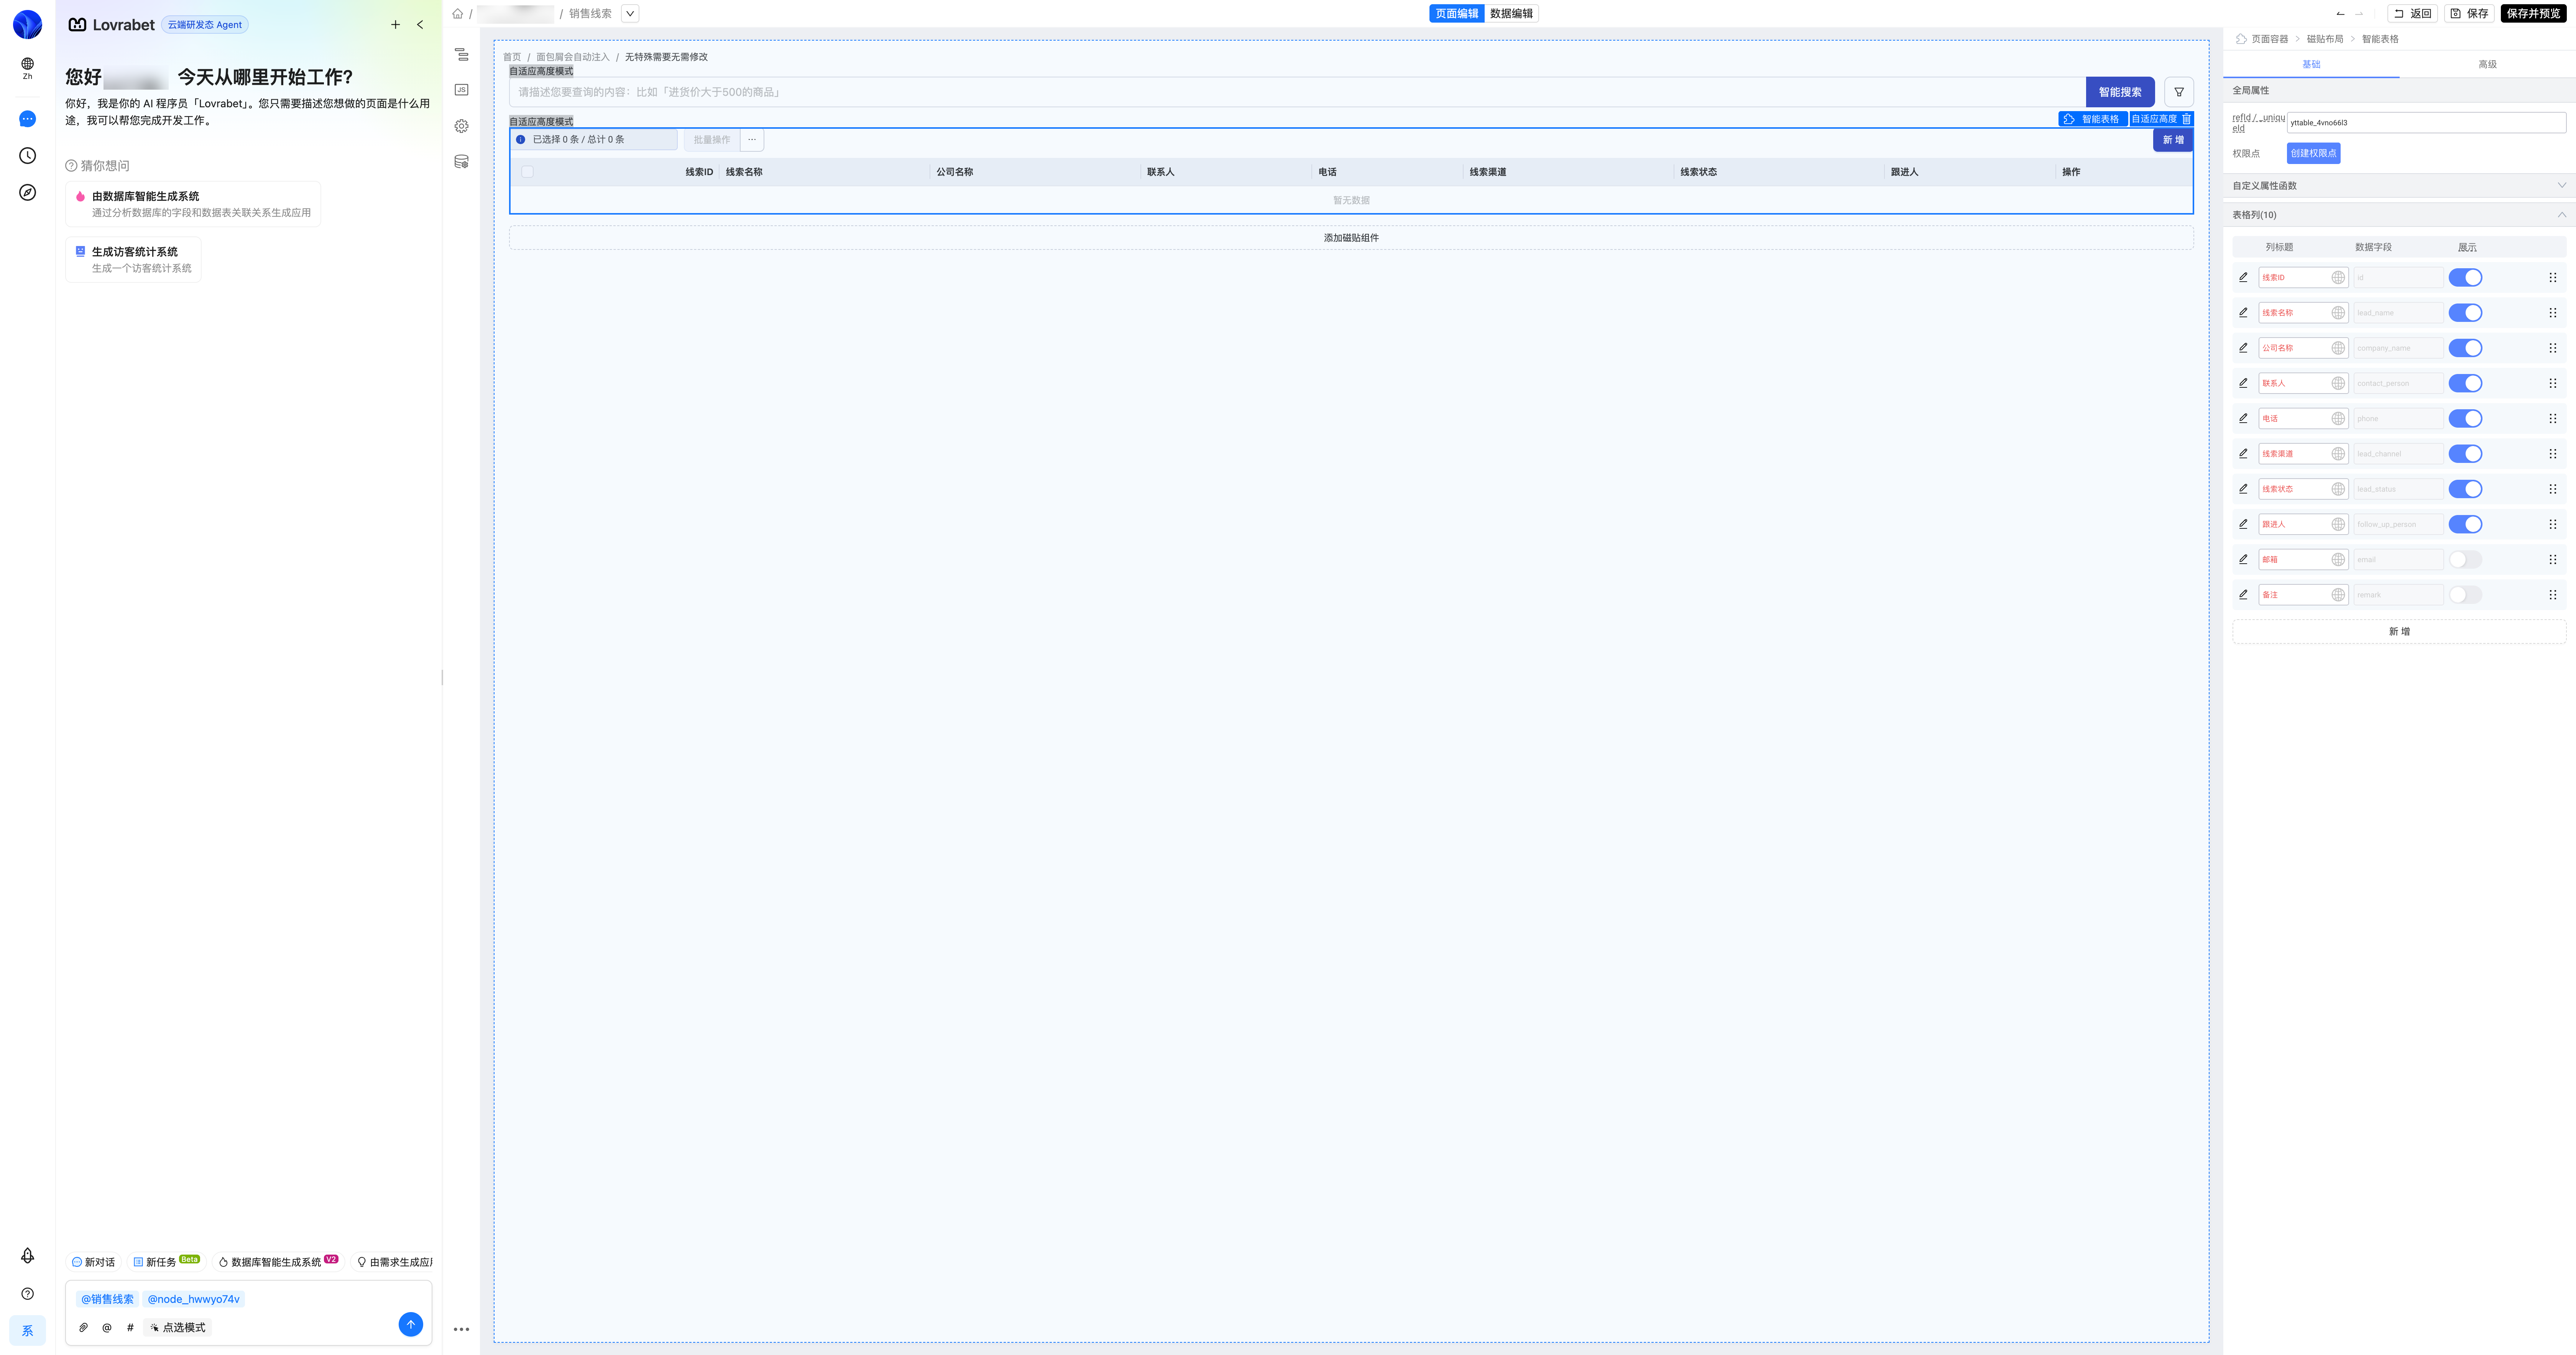
Edit the list information
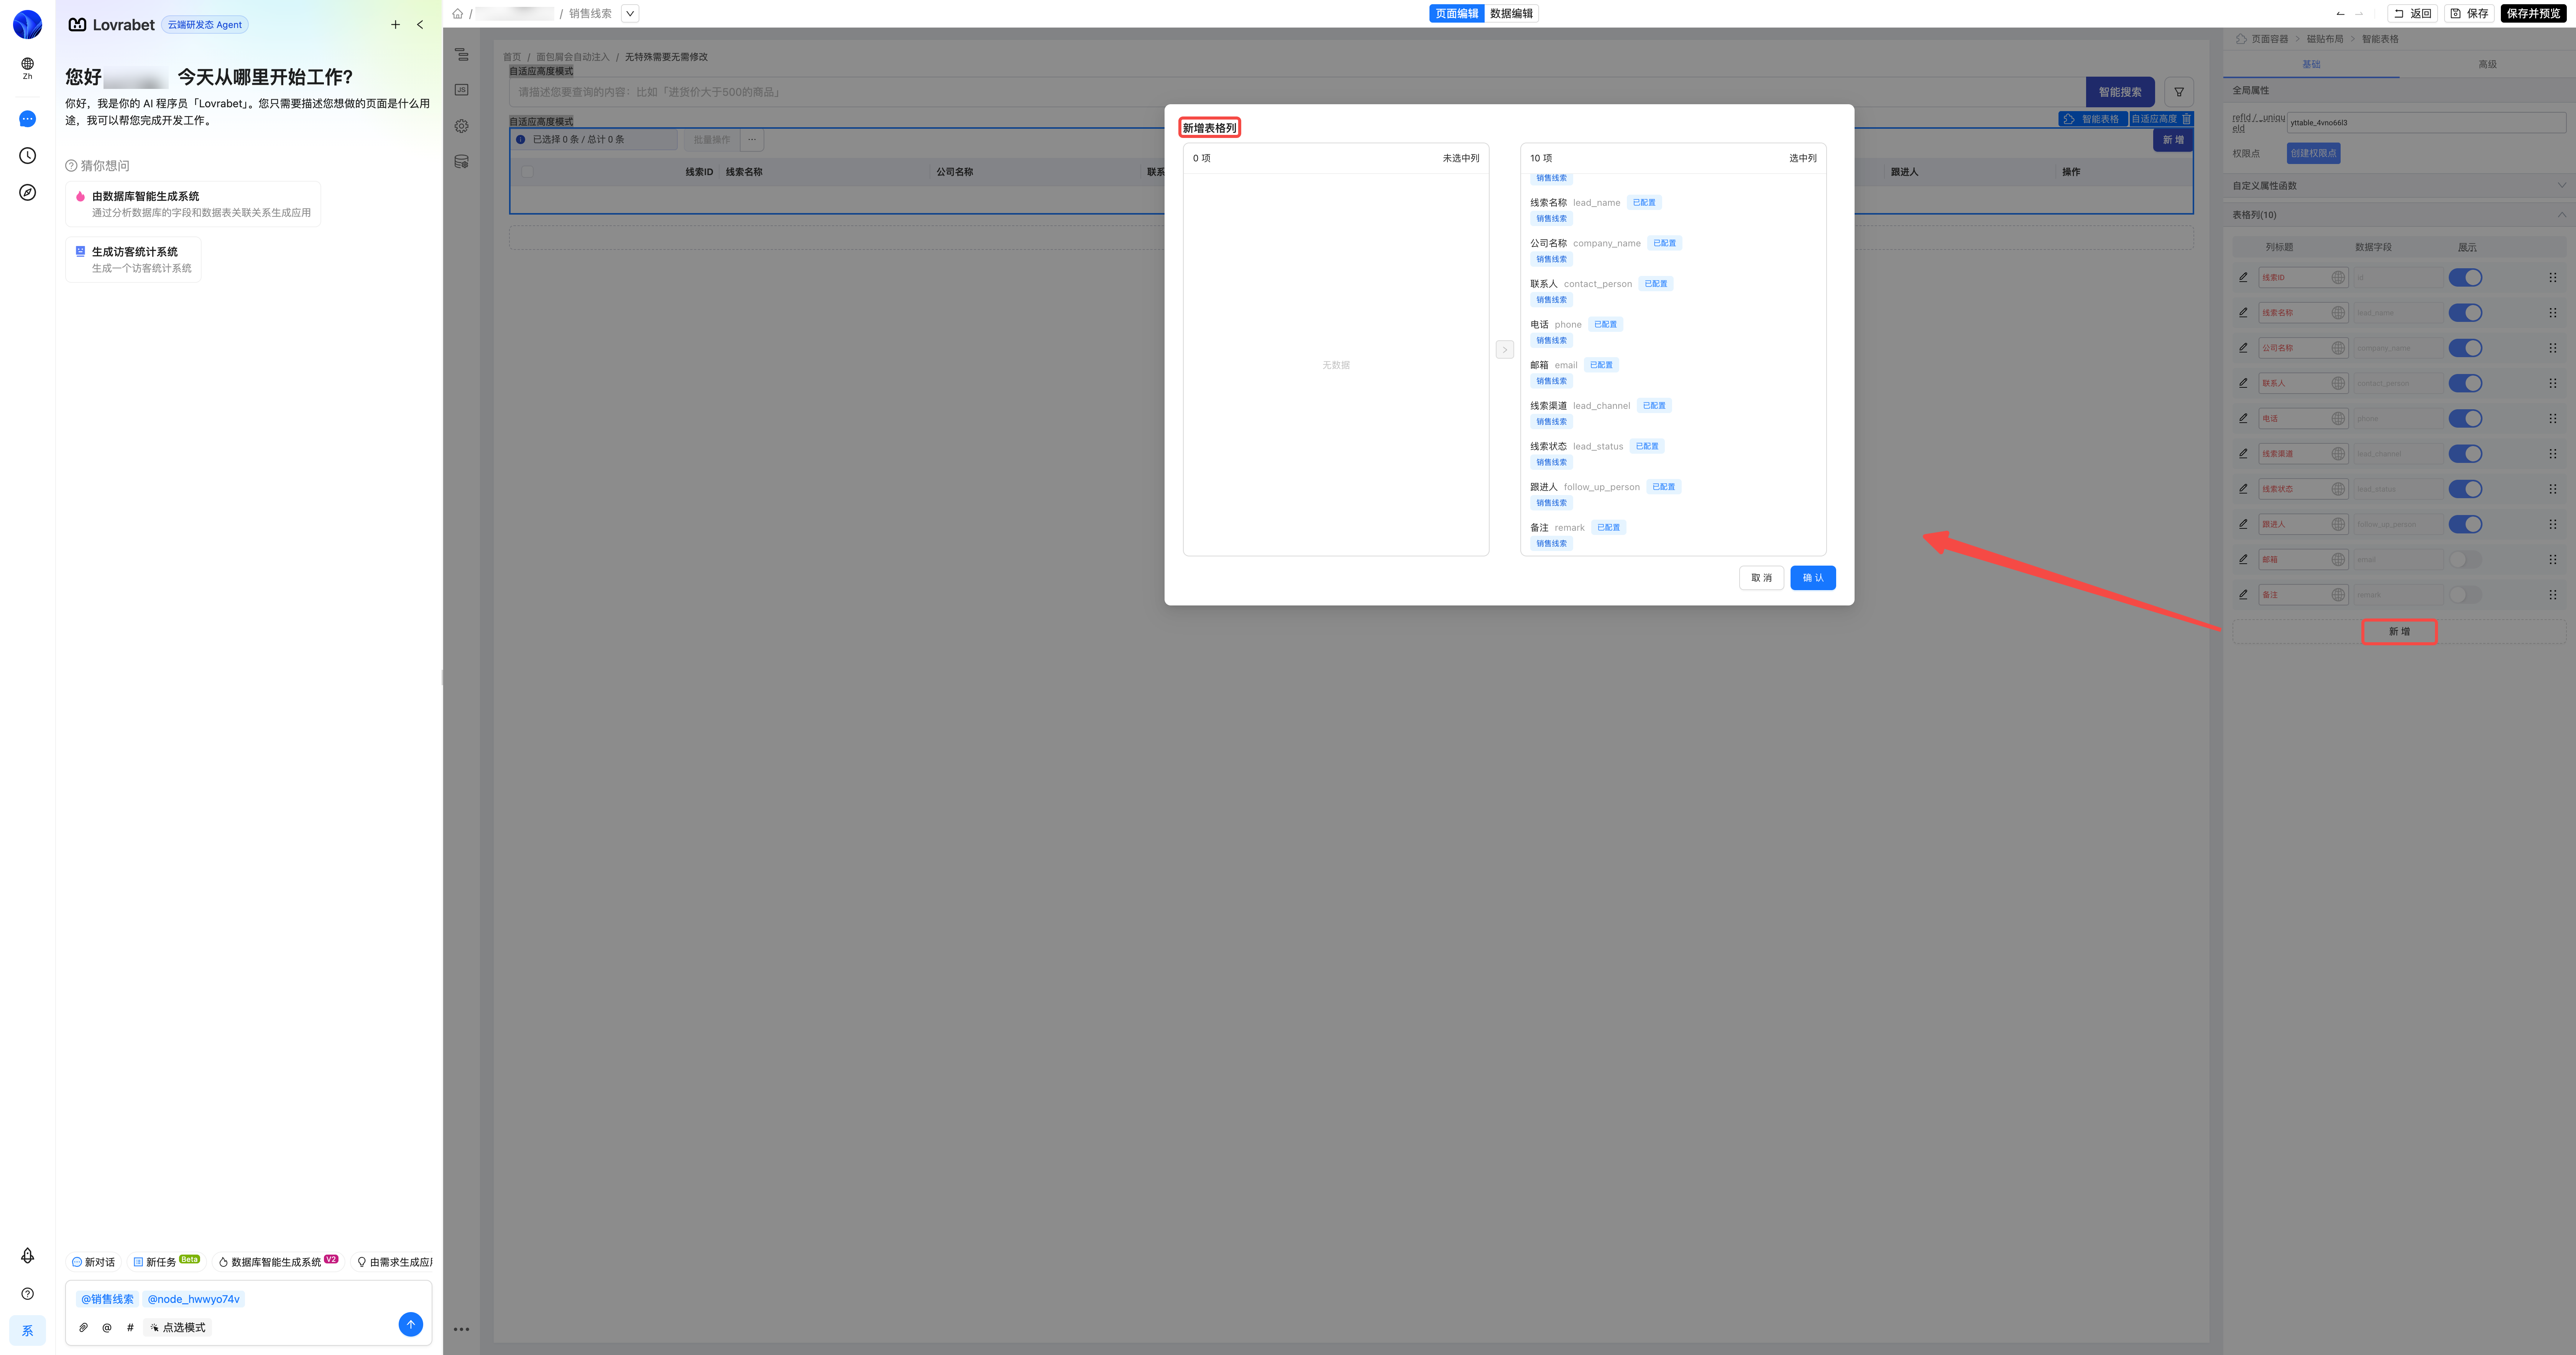
Pre-publish checklist
Before saving or publishing, run the page through this checklist. The example below uses a business page, but the checks apply to any page.
| Check | What "done" looks like |
|---|---|
| The page opens | The title, list area, main buttons, and pagination all render. |
| The data makes sense | Field names read like business language, and real records show up in the list. |
| The editor opens | Clicking "Edit page" gets you into the editor, with a canvas preview of the current page. |
| Forms submit | Required fields in the create/update form are recognized, and you see the saved result after submitting. |
| Records can be worked | Complete create, update, detail, and delete verification per your team's requirements. |
| The content is publishable | No test copy, API names, debug info, or meaningless fields on the page. |
WARNING
If submitting a new record keeps failing required-field validation on a field like "Supplier channel", check its option binding and validation settings first. Don't publish the page until the issue is fixed.
FAQ
The generated page doesn't match expectations?
Go back to the requirement, add the audience, data fields, filter conditions, button actions, and expected save result, then regenerate. Don't just write "make it better".
The page shows no data?
First check that the data source is correct, then whether the filter conditions are too narrow. If needed, verify the fields return data using a real record.
The page opens blank?
Reselect the target page from the app's page list, then enter the preview or editor. Don't save the page while it's blank.
Submitting a new record keeps complaining about required fields?
Check that field's option binding and required validation. For example, if "Supplier channel" is already selected but still flagged as required, fix the field binding first, then continue with the create, update, and publish checks.
When do you need a Backend Function, SQL, or BFF?
When a page needs complex queries, permission checks, reads across data sources, or reliable write actions, wrap that capability into a Backend Function, SQL, or BFF first, then have the page call it.
Next steps
- After the page passes the pre-publish checklist, follow your team's process to save, submit for review, or publish.
- Keep the generation requirement, key screenshots, and checklist results in the requirement record for future traceability.
- If the page's write path doesn't work end to end, fix the field binding, validation, or backend capability first, then run the checks again.